Foam rolling has become a popular way to relieve muscle tension, soreness, and tightness. Whether you are a fitness enthusiast or simply have a sedentary lifestyle, using a foam roller can help you feel better and perform better. This article will guide you through five essential steps to use a foam roller for muscle recovery effectively.
How Foam Rolling Works
Foam rolling is a form of self-myofascial release (SMR), a technique that uses pressure to release tension and tightness in the muscles and fascia. The fascia is a connective tissue that surrounds and supports the muscles, bones, and organs in your body. When the fascia is tight or damaged, it can cause pain, stiffness, and limited range of motion.
Foam rolling works by applying pressure to the muscles and fascia with a foam roller. This pressure helps to break up adhesions, scar tissue, and knots in the muscles and fascia. It also stimulates the Golgi tendon organs and the sensory receptors in the muscles, which can help reduce pain and improve muscle function.
Foam rolling can also increase blood flow to the muscles, which can help bring oxygen and nutrients to the tissues and remove waste products. This can speed up recovery, reduce muscle soreness, and improve performance.
When you foam roll, you may feel some discomfort or even pain. This is normal, especially if you have tight or damaged muscles and fascia. However, you should not feel sharp or intense pain, which could indicate an injury or a more serious condition. If you experience sharp pain, stop foam rolling and consult a healthcare professional.
Foam rolling can be done before or after a workout, or on rest days. It’s important to listen to your body and not overdo it, as too much foam rolling can cause inflammation and further damage to the muscles and fascia. Start with a few minutes of foam rolling per day and gradually increase the time and intensity as your muscles and fascia become more flexible and pliable.
Overall, foam rolling is an effective and accessible way to improve muscle recovery, relieve pain and tension, and enhance your overall well-being. Incorporating foam rolling into your fitness routine can help you reach your fitness goals and feel your best.
Step 1: Choose the Right Foam Roller
There are different types of foam rollers, and choosing the right one is crucial for an effective foam rolling session. The most common types of foam rollers are:
- EVA foam rollers: These are the most basic and affordable foam rollers. They are ideal for beginners and those who prefer a softer foam roller.
- EPP foam rollers: These foam rollers are more durable than EVA foam rollers and can provide a deeper massage. They are ideal for intermediate and advanced users.
- Textured foam rollers: These foam rollers have different patterns, such as grids or bumps, that can target specific muscles and provide a more intense massage.
When choosing a foam roller, consider your level of experience, the areas of your body you want to target, and your budget.
Step 2: Warm Up and Stretch Before Foam Rolling
Before starting your foam rolling session, it’s essential to warm up and stretch your muscles. This will increase blood flow to your muscles and prepare them for the foam rolling. You can warm up by doing some light cardio, such as jogging in place or jumping jacks. Then, stretch the muscles you want to target with the foam roller.
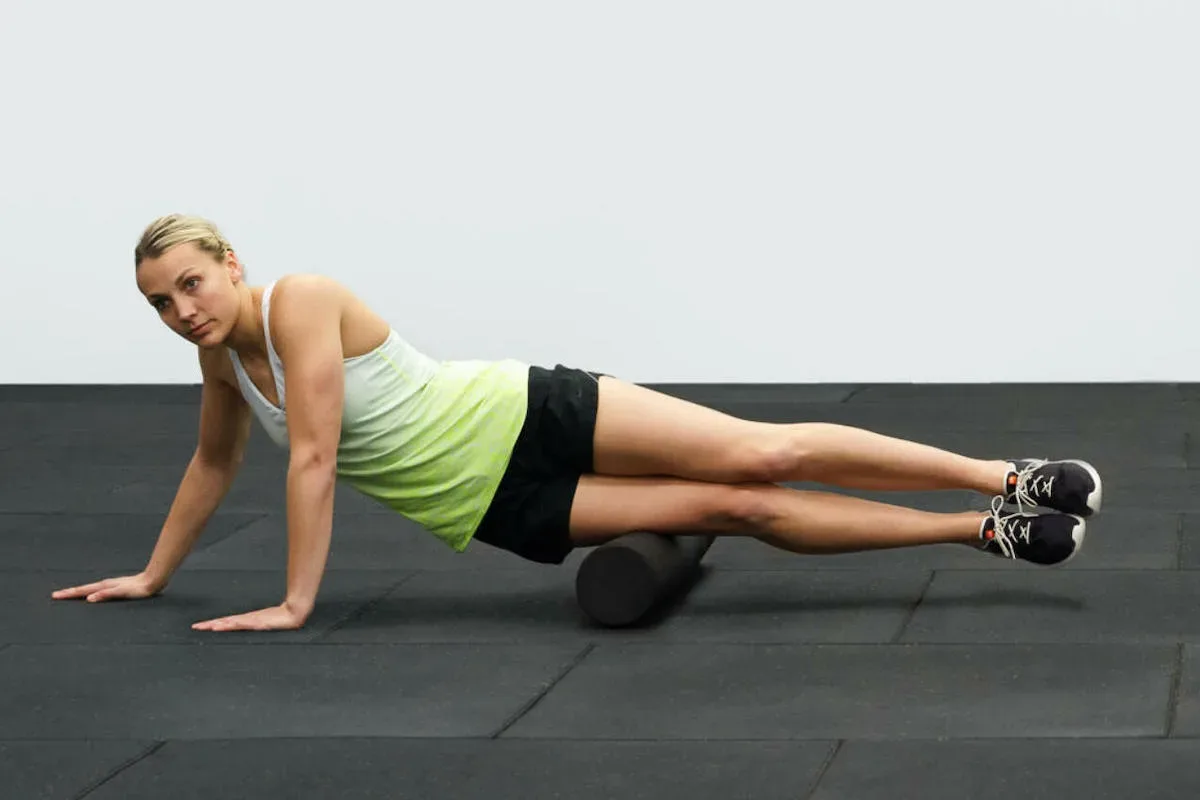
Step 3: Use Proper Form
Using proper form is crucial to prevent injuries and get the most out of your foam rolling session. Here are some tips for using proper form:
- Start slow and gentle: If you are new to foam rolling, start with a gentle pressure and slow movements. You can gradually increase the pressure and speed as you get more comfortable.
- Roll along the muscle: When foam rolling, roll along the length of the muscle, from the origin to the insertion. Avoid rolling over joints, bones, or areas with no muscle tissue.
- Use your body weight: Use your body weight to apply pressure to the foam roller. This will provide a deeper massage and save your hands and wrists from fatigue.
- Pause on tight spots: When you feel a tight spot, pause and hold the foam roller on that spot for 20-30 seconds. This will help release the tension and improve blood flow to the area.
Step 4: Focus on the Major Muscle Groups
Foam rolling can target different muscle groups, but it’s essential to focus on the major muscle groups first. These include:
- Quadriceps: These are the muscles on the front of your thighs. Foam rolling can help relieve knee pain and improve your range of motion.
- Hamstrings: These are the muscles on the back of your thighs. Foam rolling can help prevent and relieve tightness and soreness.
- Calves: These are the muscles on the back of your lower legs. Foam rolling can help prevent and relieve shin splints and plantar fasciitis.
- Back: Foam rolling can target different areas of your back, such as your upper back, lower back, and lats. It can help relieve tension and improve your posture.
Step 5: Cool Down and Stretch After Foam Rolling
After your foam rolling session, it’s essential to cool down and stretch your muscles again. This will help flush out the toxins and waste products that have been released during the foam rolling. You can cool down by doing some light cardio, such as walking or cycling. Then, stretch the muscles you targeted with the foam roller.